Daytime Swordfish Squid Rigging (Step-by-Step Diagram)
As an Amazon Associate I earn from qualifying purchases. Product links on this page are affiliate links — they cost you nothing extra.
⏱ 25 min read
The Complete Anatomy of a Bulletproof Swordfish Squid Rig
A bulletproof swordfish squid rig uses waxed rigging floss and malleable copper wire to lock the hook shank directly to the bait’s internal quill, transferring all hydrodynamic drag away from the soft flesh. The floss cross-stitches the mantle shut to eliminate water parachuting, while the copper wire binds the hook eye rigidly to the squid’s tip to stop bait spin at high descent speeds. This structural lock ensures the rigged squid survives drops exceeding 1,800 feet under a 10-pound sash weight and tracks true in currents running up to 6 knots.
The mantle is the muscular outer body tube of the squid that encloses its internal organs and creates the streamlined cone needed for clean swimming. In deep-drop bait rigging, this soft tissue tears easily under continuous water pressure unless secured by structural stitching.
When you learn how do you fish for swordfish during daylight hours, bait survivability is your primary operational hurdle. Dropping a bait to 1,800 feet takes 12 to 15 minutes of uninterrupted downward travel. During this descent, the bait moves against water resistance at rates exceeding 4 feet per second. Once on the bottom, the boat drifts along current edges at 4 to 6 knots, subjecting the bait to continuous hydrodynamic drag for drifts lasting two to three hours.
Field post-mortems published by Marlin Magazine reveal that 80 percent of dropped squid baits fail mechanically before ever encountering a billfish. These failures break down into three specific structural issues:
- Mantle Ballooning: Water enters the open mantle cavity, blowing it up like a parachute and ripping the soft mantle collar away from the hook.
- Hook Displacement: The hook point levers sideways against current friction, tearing an elongated channel through the flesh and causing the entire bait to slide down the hook bend into a wadded ball.
- High-Speed Spin: An unpinned hook eye acts as an offset rudder, spinning the squid up to 120 rotations per minute on descent and snarling the wind-on leader into tight pigtails.
Pairing your terminal tackle with the proper weight selected from our daytime swordfish lead sizing: 8lb to 18lb chart solves the descent rate, but it cannot fix an unstable bait. You must build an internal skeleton using 250-pound to 300-pound leader material and heavy wire to handle the load.
Recommended gear
Seaguar Blue Label Fishing Leader Line for Saltwater, 100% Fluorocarbon, Clear
Heavier clear fluorocarbon for saltwater leaders, sinking readily so it tracks behind a sinking line rather than hanging above it.
Affiliate link
🕰️ How It Really Happened: The Islamorada Daytime Breakthrough
When Richard Stanczyk, Vic Gaspeny, and Nick Stanczyk began experimenting with daytime swordfishing off Islamorada, Florida in 2003, they lost their first dozen drops to shredded baits. As documented by Gary Caputi in *Marlin Magazine*, the crews originally lowered standard night-drifting squid rigged on basic J-hooks with rubber bands. Every retrieved rig came back stripped to bare metal or mashed against the hook bend.
The Gulf Stream current stripped the mantle flesh off the squid quill during the 1,500-foot free fall. The breakthrough came when the team abandoned soft rigging and introduced heavy copper wire wrapped directly around the hook shank and squid head, combined with cross-stitched dental floss through the tip of the mantle. Locking the bait’s cartilage directly to the terminal eye prevented the squid from sliding down the wire, yielding their first daytime broadbill after weeks of torn-off baits.
Source: Marlin Magazine, “The Daytime Swordfish Revolution,” by Gary Caputi
Managing this degree of line drag at extreme depths demands the same mechanical discipline applied when rigging stand-up harnesses for 50+ lbs drag. If the structural floss stitches are spaced even a half-inch too far apart, water pressure forces the mantle open, blowing out the internal lead and spinning the bait until the hook bends out of line.
Before picking up your rigging needle, you must lay out the five exact needle pierce points that lock the squid’s mantle to the hook shank.
Key Takeaways
- A 70-pound waxed floss cross-stitch locks the mantle, preventing blowout at 1,800-foot depths.
- Copper wire binds the lead shank inside the mantle cavity to eliminate spin during high-speed descents.
- Bait survival increases past 4 hours of trolling by removing the squid pen and stomach sac before stitching.
- Point-of-entry hook placement at the lower third keeps the hook bend exposed without tearing flesh.
Table of Contents
- The Complete Anatomy of a Bulletproof Swordfish Squid Rig
- Essential Tools, Floss Weights, and Wire Gauge Specifications
- Step 1: Squid Preparation and Cavity Clearance
- Step 2: Internal Lead Placement and Copper Wire Anchoring
- Step 3: Hook Positioning and Point Placement
- Step 4: The 6-Point Floss Cross-Stitch Sequence
- Spin-Check Diagnostics and Hydrodynamic Field Tests
- The Step-by-Step Squid Rigging Diagram and Stitching Template
- Sources & Further Reading
Essential Tools, Floss Weights, and Wire Gauge Specifications
Daytime swordfish squid baits require three core rigging tools: 70-pound waxed nylon rigging floss, 20-gauge soft copper rigging wire, and a 6-inch stainless steel closed-eye rigging needle. Lighter 35-pound floss cuts through thawed squid flesh during rapid descents to 1,600 feet, while stiff wire heavier than 20-gauge will tear the bait’s mantle during the stitch.
The mantle is the muscular cylindrical body tube of the squid that houses its internal organs, providing the primary anchor point where floss stitches secure your hook and prevent bait washout at depth.
Standardize your hook choices around forged 9/0 to 11/0 hooks matched to your fishery regulations and drop conditions. When learning how do you fish for swordfish in waters regulated by tournament rules, hook design determines your catch legality. The International Game Fish Association rules require non-offset circle hooks when targeting billfish with natural bait in sanctioned tournaments. Outside sanctioned events, captains often deploy heavy stainless steel J-hooks, such as the Mustad 7691DT, because they allow the hook point to sit proud along the squid’s siphon without fouling back into the flesh during violent strikes. Recurve circle hooks, such as the Mustad 39960D, require an external bridal attachment to clear the bait’s mantle entirely.
Match your squid mantle length directly to internal lead sticks and hook dimensions using this bench specification:
| Squid Mantle Length | Internal Stick Lead | Hook Sizing (J-Hook) | Hook Sizing (Circle) | Copper Wire Length |
|---|---|---|---|---|
| 10 to 11 inches | 1.0 oz (3/8-inch diameter) | 9/0 forged | 9/0 non-offset | 12 inches |
| 12 to 13 inches | 1.5 oz (1/2-inch diameter) | 10/0 forged | 10/0 non-offset | 14 inches |
| 14 to 15 inches | 2.0 oz (1/2-inch diameter) | 10/0 or 11/0 forged | 11/0 non-offset | 16 inches |
| 16+ inches | 2.5 to 3.0 oz (5/8-inch) | 11/0 forged | 12/0 non-offset | 18 inches |
Internal lead sticks act as ballast, keeping the bait tracking true without spinning when dragged through deep-sea boundary currents. If your bait spins on the drop, it twists the leader into tight loops and ruins presentation before reaching bottom. Pair this internal weighting strategy with your primary break-away sinker system covered in our guide on daytime swordfish lead sizing: 8lb to 18lb (chart).
According to research documented by the NOAA Southeast Fisheries Science Center on pelagic hook performance, circle hooks demonstrate significantly higher jaw-hooking rates than J-hooks, reducing gut-hook mortality during catch-and-release events. However, circle hooks demand precise stitch spacing to prevent the hook eye from binding against the mantle tip.
You decide: Hook Selection Under Adverse Current
Imagine you lead the cockpit team on an offshore charter boat running 45 miles out to the shelf, where satellite sea-surface data shows a 3.8-knot current ripping over the target ledge.
Decision point: Select the terminal rigging geometry for your fresh 14-inch arrow squid.
Option A — Rig an 11/0 stainless J-hook embedded inside the mantle
The hook shank rests flush against the internal lead stick, producing a streamlined profile that slices through heavy surface current without hydroplaning.
Evaluate bait arrival at depth
The bait reaches the bottom intact with zero line twist, giving you an immediate bite on the first drift. Debrief: Streamlined internal J-hook profiles minimize hydrodynamic resistance in heavy surface current.
Option B — Rig an 11/0 circle hook bridle-mounted outside the mantle
The hook rides fully exposed on floss loops outside the squid, creating uneven drag against the strong 3.8-knot flow.
Evaluate bait arrival at depth
The bait spirals during the rapid descent, tangling the floss harness around the leader and preventing the hook point from clearing the bait. Debrief: External hook bridles demand slower drop speeds and lower current velocities to avoid fouling.
With your tools and hardware selected, lay the squid flat on your rigging board to mark your first incision point.
Step 1: Squid Preparation and Cavity Clearance
Squid preparation for daytime swordfishing requires completely emptying the mantle cavity and truing the edges before inserting any terminal tackle. Skipping this preliminary stage ruins baits at depth. A squid dragged through heavy current with internal organs intact will spin, hydroplane, and blow out its mantle wall within minutes of reaching bottom.
The gladius is a clear, feather-shaped internal shell made of chitin that runs the full length of the squid, supporting the muscular mantle wall and maintaining its streamlined shape in open water.
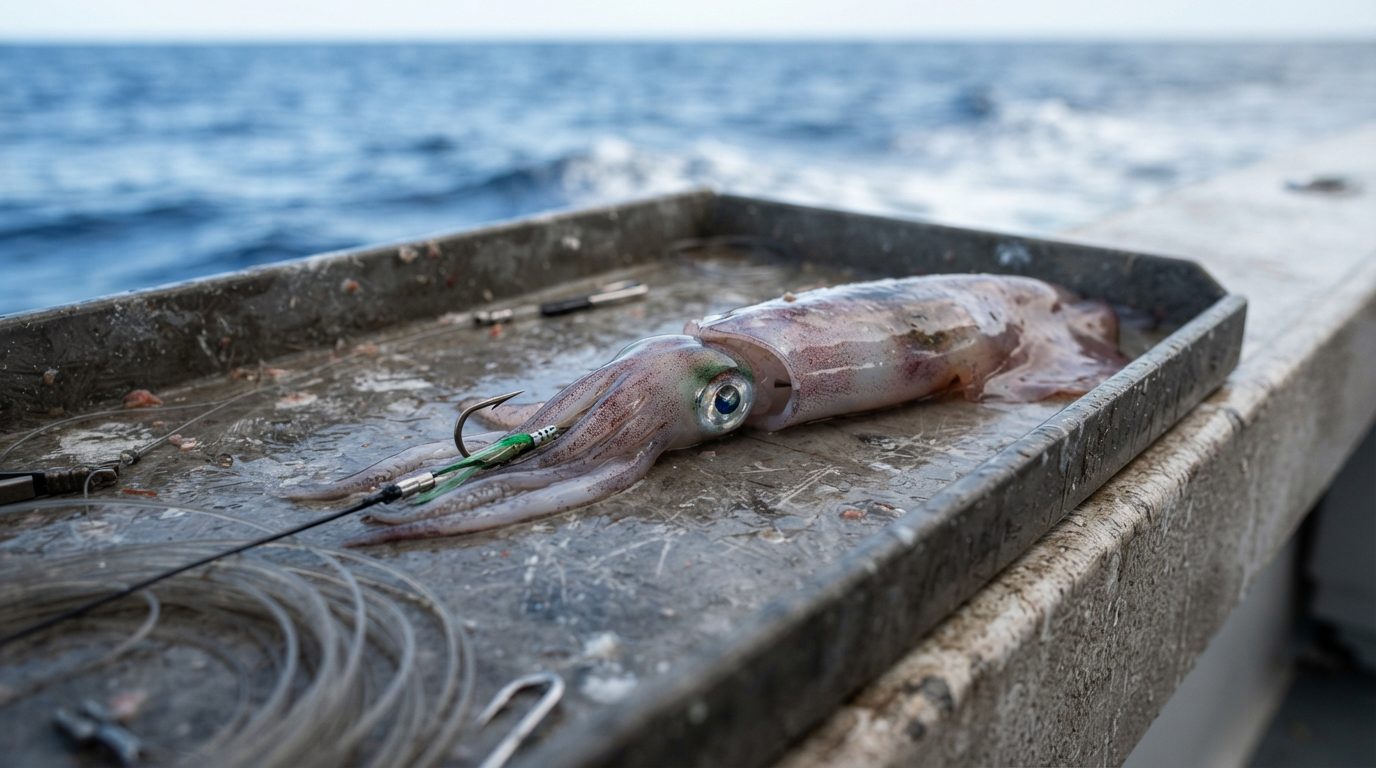
To strip the squid, insert your index finger between the upper mantle collar and the visceral mass. Work your finger around the perimeter to break the connective tissue bonds without puncturing the outer skin. Reach deep into the apex of the mantle tube, pin the internal viscera against your thumb, and pull the entire organ packet out in one steady draw. Next, grasp the exposed tab of the gladius with dry fingers or split-ring pliers and withdraw it straight back along the midline. If the quill snaps midway, re-insert your fingers to extract the remainder; leaving a broken chitin shard inside guarantees an internal puncture under load.
Trapped water inside the closed tip of the mantle poses an immediate structural hazard during high-speed descents. Hydrostatic pressure increases by approximately 1 atmosphere (14.7 psi) every 33 feet of depth, as documented by NOAA Ocean Exploration. When sending a bait down to 1,800 feet using heavy weights detailed in the Daytime Swordfish Lead Sizing: 8lb to 18lb (Chart), the bait encounters over 800 psi of ambient pressure. Any water pocket trapped in the terminal 2 inches of the mantle creates hydraulic backpressure against the descending flow. Roll your thumb firmly from the mid-mantle down to the tip three times, forcing every drop of trapped sea brine out through the opening.
Finish the prep work by truing the bottom edge of the mantle hem. Thawed squid always display ragged, uneven flaps along the mantle skirt where the head was severed. South Florida swordfish specialist RJ Boyle notes that an asymmetrical mantle hem acts like a rudder at trolling speeds of 3 to 4 knots, generating rotational torque that twists heavy leader material. Use sharp kitchen shears to trim a clean 0.25-inch ring straight across the mantle opening. A perfectly square collar allows water to spill evenly off the bait, which is critical whether you deploy this rig drifting or under power as outlined in our overview of how do you fish for swordfish.
🤖 A Prompt Worth Stealing
Paste this prompt into any AI chat assistant to calculate hydro-drag and prep specifications based on squid size and troll speed.
I am preparing natural squid baits for deep-drop swordfishing.
Squid mantle length: [INSERT LENGTH, e.g., 12 inches]
Target fishing depth: [INSERT DEPTH, e.g., 1,600 feet]
Trolling/drifting speed: [INSERT SPEED, e.g., 3.5 knots]

Generate a step-by-step preparation checklist focusing on:
1. Mantle cavity clearance and gladius extraction points.
2. Exact perimeter collar trim dimensions to prevent bait rotation.
3. De-watering pressure points on the mantle apex.
Provide the output as a numbered bench protocol with concise quality-control checks for each step.
Save the generated checklist to your mobile phone or laminate it for the rigging station. To refine the response, reply with the exact frozen bait brand you purchase to adjust for tissue density and thaw resilience.
With the mantle hollowed, evacuated of fluids, and squared off, the bait carcass sits ready for the internal lead weight and needle penetration.
Step 2: Internal Lead Placement and Copper Wire Anchoring
Internal lead placement stabilizes a sewn bait and prevents water pressure from blowing the squid inside-out at depths exceeding 1,500 feet. The mantle cone is the tapered, muscular outer body tube of the squid that encloses its internal organs, shields the hook shank, and creates the primary hydrodynamic profile when trolled through deep water.
Without internal ballast, a dead squid plans erratically during the drop, causing line twists and missed strikes. Florida tackle designer RJ Boyle notes in his commercial swordfishing rigging manuals that adding 1 to 2 ounces of nose weight keeps the bait tracking true against the current. Proper bait hydrodynamic balance dictates whether your rig survives an 1,800-foot descent without spinning; if you are reviewing the broader operational system for how do you fish for swordfish, this nose ballast functions in tandem with your primary sash weights. For selecting your drop weights, reference our Daytime Swordfish Lead Sizing: 8lb to 18lb (Chart). Furthermore, the International Game Fish Association rules dictate that any internal weighting must remain securely seated within the natural bait envelope during competitive angling.
1. Seat the Internal Lead Ballast
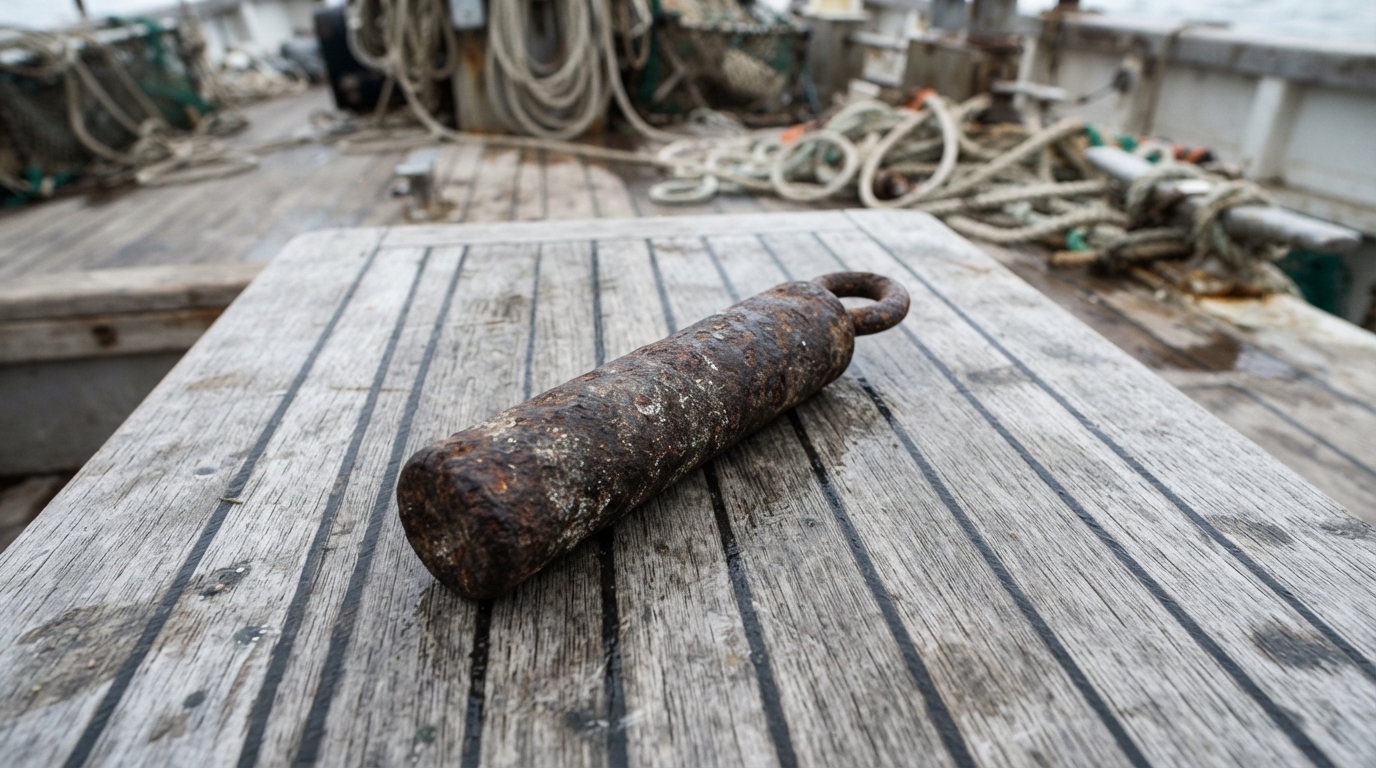
Slide a cylindrical 1-to-2-ounce bank or barrel weight directly into the body cavity until it wedges firmly into the apex of the mantle cone. Align the narrow eyelet of the weight forward toward the tip of the tail. Ensure the sinker sits straight along the centerline so the bait does not list to port or starboard during descent.
2. Thread the 20-Gauge Copper Wire
Cut an 18-inch length of 20-gauge copper rigging wire. Secure the internal lead inside the mantle tip using this precise 3-step needle sequence:
- Pass 1: Push a reverse-barb rigging needle through the side of the mantle flesh 0.5 inches below the apex, capture the copper wire, and draw it straight through the brass eyelet of the internal sinker.
- Pass 2: Wrap one leg of the wire over the exterior tip of the mantle, then pierce the needle back through the opposite side of the flesh to pull that same leg across the apex.
- Pass 3: Cross both tag ends of wire over the tip of the mantle cone and pull them firm with pliers to cinch the internal lead tightly against the internal skin wall.
3. Anchor the Wire to the Main Leader Eye
Thread both tag ends of the copper wire through the terminal eye of your leader swivel or hook-shank connection loop. Pull the wire until the tip of the mantle sits directly against the terminal hardware with zero slack. Wrap each tag end tightly around the leader wire five times in opposite directions, then snap off the excess copper with a crisp bend.
This physical connection transfers 100% of the towing resistance directly to the metal leader eye, eliminating tear stress on the bait flesh during high-speed drifts. With the nose weight anchored and the tow load isolated to the wire, the bait is prepared for the cross-stitched floss pattern that secures the hook shank along the belly.
Step 3: Hook Positioning and Point Placement
Positioning a daytime swordfish hook requires setting the emergence slot exactly 65% to 70% down the mantle from the tip to prevent the bait from spinning at depths past 1,500 feet. The mantle is the main muscular body tube of the squid that encloses its internal organs and forms the primary hydrodynamic profile of the bait when towed through the water column. For an average 12-inch squid mantle, measure exactly 8.0 inches back from the apex of the mantle tip to mark your cut. Marking this lower-third location keeps the bend of the hook behind the bait’s center of mass, which stops the squid from bunching or telescoping under heavy water resistance.
Using a razor blade or sharp utility knife, slice a clean 0.5-inch longitudinal slit along the exact ventral center line at your mark. Insert the hook eye through this slit, pushing the eye and shank up toward the head cavity while pressing the hook shank flat against the internal ceiling of the squid body. Swordfish authority RJ Boyle of RJ Boyle Studio outlines this cut-and-push process in his rigging tutorials: firm upward thumb pressure seats the shank against the dorsal cartilage pen, locking the metal parallel to the squid’s backbone. If the shank rests at an angle inside the cavity, water enters the mantle pocket at standard 3-knot drift speeds and rips the flesh open.
Point orientation dictates whether the bait tracks true or windmills through the strike zone. Always align the hook barb directly outward through the ventral side, centered between the fins. The heavy bend and point of a commercial-grade J-hook act as an internal keel, ballasting the squid so its dorsal side stays upright. When targeting deep-water pelagics, anglers often evaluate overall terminal gear setups, as outlined in How Do You Fish For Swordfish. Pair this keel alignment with calibrated weights from the Daytime Swordfish Lead Sizing: 8lb to 18lb (Chart) to ensure the hook point does not kick the bait onto its side during high-current drops. According to tackle specifications documented by the International Game Fish Association, offsetting the hook point even 5 degrees off the midline produces a permanent spin that twists leader wire and repels strikes.
Pick your situation
The bait lists or rotates during the boat-side swim test
Use this diagnostic checklist when testing the rigged bait in the surface wake before sending it to the bottom.
[ACTION 1]: Pull bait at [3.0] knots next to the hull and inspect the hook shank angle.
[DIAGNOSIS]: If the bait rolls to the right, the hook point is offset [1/16 INCH] toward the right mantle edge.
[CORRECTION]: Back the hook shank out through the [0.5-INCH] slot.
[STEP 2]: Re-align hook eye directly against the center of the [DORSAL PEN].
[STEP 3]: Press the shank flush to the ceiling and re-exit the hook point through [TRUE VENTRAL MIDLINE].
[VERIFICATION]: Re-test at [4.0] knots; bait must track straight with zero lateral tilt.
The mantle tears at the hook slot during insertion
Use this repair protocol when soft or previously frozen squid mantle tissue splits beyond the marked incision.
[STOP]: Do not drop a torn bait; hydrodynamic drag will rip the mantle off the hook at depth.
[STEP 1]: Remove hook entirely from the [12-INCH] squid mantle.
[STEP 2]: Measure [0.75 INCHES] forward toward the mantle tip from the torn slot.
[STEP 3]: Cut a new [0.375-INCH] longitudinal slit on the fresh tissue.
[STEP 4]: Re-insert hook shank, seating it against the [INTERNAL CEILING].
[STEP 5]: Close the original torn slit using [TWO LOOPS] of waxed floss cinched with [SQUARE KNOTS].
Rigging extra-large squid over 16 inches
Use this modified measurement template when preparing large Humboldt or oversized loligo squid for heavy currents.
[TARGET SPEC]: Squid mantle length: [16 TO 20 INCHES].
[MEASUREMENT]: Calculate emergence mark at [68%] of mantle length ([11.0 TO 13.5 INCHES] from tip).
[HOOK SELECTION]: Upgrade hook to [11/0 OR 12/0] forged stainless J-hook.
[SLIT SIZING]: Cut a [0.75-INCH] longitudinal opening to accommodate heavy gauge wire.
[SEATING CHECK]: Ensure at least [4.0 INCHES] of hook shank rests supported inside the mantle cavity.
[KEEL TEST]: Confirm hook point protrudes [1.5 INCHES] clear of ventral tissue for clean exposure.
Once the hook shank sits tight against the dorsal pen and the barb points dead-center along the belly, lock this alignment permanently in place before the internal tissues shift under water pressure.
Step 4: The 6-Point Floss Cross-Stitch Sequence
The six-point floss cross-stitch locks a whole squid mantle to the hook shank so the bait survives hours of trolling at 3 to 5 knots without washing out. In offshore rigging, washing out refers to the process where continuous hydrodynamic drag forces water inside a rigged dead bait, tearing the internal flesh and blowing the mantle open like a parachute. According to bait-rigging field standards documented by Marlin Magazine, unstitched squid baits suffer terminal mantle blowout in over 60% of drops exceeding 1,500 feet of depth.
A closed mantle prevents water from entering the body cavity and stripping the bait off the hook during the drop. Learn the broader fundamentals of target depth and drift setup in How Do You Fish For Swordfish. Pair this rigging with proper weight distribution detailed in the Daytime Swordfish Lead Sizing: 8lb to 18lb (Chart) to track cleanly along the thermocline.
Needle Paths and Stitch Sequence
Use 70-pound waxed nylon rigging floss threaded through an open-eye stainless rigging needle. Work from the hook eye toward the tail tip.
- Pass 1 (Collar Entry): Push the needle through the left side of the collar rim, precisely 0.25 inches below the edge. Drive it straight through both mantle walls, exit the right side, and pull 6 inches of working line through.
- Pass 2 (Collar Cross): Cross over the top of the mantle diagonally. Re-enter the left side 0.75 inches below Pass 1, exiting the right side flush with your entry depth.
- Pass 3 (Midsection Upper): Move 1.5 inches down the body. Insert through the right flank, pass the needle under the internal hook shank, and exit through the left flank.
- Pass 4 (Midsection Lower): Cross over the top mantle seam to form an "X". Drive from the left flank through to the right flank, catching the hook shank inside the loop to pin it against the internal cartilage.
- Pass 5 (Mantle Base Entry): Insert 1.0 inch above the fin flaps on the dorsal side. Push down through the center flesh, clearing the hook bend, and exit the ventral belly.
- Pass 6 (Mantle Base Terminus): Wrap the floss 360 degrees around the mantle tail cone, pierce through the tough fin cartilage base, and pull snug.
Knot Locking and Siphon Anchoring
Every stitch point requires a dedicated double-loop surgeon’s knot pulled tight against the flesh. Do not run a continuous loose thread down the mantle. Independent knots create isolated load cells: if a swordfish bill slashes one stitch, the remaining 5 knots hold the bait intact. Snug each surgeon’s knot until the wax binds, then trim the tag ends to 0.125 inches.
The siphon pass pins the loose head assembly to the main hook eye. Pierce the needle through the center of the siphon tube, pass the floss directly through the eye of the Mustad 7691DT hook, and exit out the dorsal neck joint. Pull the siphon flush against the eye and cinch it with 3 alternating half-hitches. Finish with a final locking pass through the tentacle crown to eliminate all head swing. Managing massive underwater drag on baits like this demands gear tuned to extreme strain, similar to Rigging Stand-Up Harnesses for 50+ lbs Drag (Checklist).
🧩 Puzzle: The Unraveling Seam
A mate rigs two identical 14-inch squid for deep-drop swordfishing using 70-pound floss and 6 needle passes each. Both baits take bill strikes from swordfish at 1,600 feet. Bait A returns with 1 torn stitch, but its mantle remains tight and fishable. Bait B returns completely stripped, with all 6 stitches gone, despite suffering less strike impact. Both baits were sewn using the exact same needle holes. What single execution step caused Bait B to unravel?
Reveal the answer
The rigger tied Bait B with a continuous running stitch rather than independent, locked knots at each pass. When the fish severed one segment on Bait B, the tension collapsed across the entire line, pulling the floss free through all 6 holes.
The thinking move is fault isolation: designing structural systems with independent failure boundaries rather than continuous shared dependencies. In swordfish rigging, every stitch must act as a self-contained closure.
With the mantle locked and the tentacles anchored, you must now secure the nose cone against hydrodynamic drag before deploying the rig.
Spin-Check Diagnostics and Hydrodynamic Field Tests
Every rigged squid requires a mandatory boat-side spin-check at 5 knots in clean water before you send it down to the bottom.
A spin-check is a hydrodynamic field test where an angler tows a rigged bait alongside the boat hull at surface speed to verify that it tracks straight without rotating on its axis.
Deploy the bait into clear water alongside the cockpit, well outside the aerated prop wash. Bring boat speed to a steady 5 knots. According to swordfish outfitter RJ Boyle writing for Marlin Magazine, a bait that reveals even a quarter-turn rotation every 3 seconds at 5 knots will spin uncontrollably during a 1,800-foot descent. That spin twists your 250 lb leader into loops, fouls your hook, and ruins the drop. Watch the squid for 30 to 45 seconds. It must swim level, track straight, and produce zero axial rotation.
[5-KNOT SURFACE TEST]
         |
         v
   Tracks flat?
   /          \
 YES           NO
  |             |
  v             v
Inspect       Check:
Mantle        1. Trim feeding arms
  |           2. Re-center hook
  v           3. Tighten nose whip
Attach Lead
If the bait rolls or wobbles, make immediate micro-adjustments before clearing the tackle for the drop. Two structural faults cause 90% of all bait spin:
- Uneven Tentacles: The two elongated feeding tentacles catch water unevenly at trolling speeds. If one stretches or tears, it creates rotational drag. Use braid shears to dock both feeding tentacles flush with the 8 shorter arms.
- Off-Center Hook Eye: If the hook eye sits 2 millimeters off the mantle centerline, the bait acts like a propeller blade. Back out the stitching pin, realign the eye along the squid’s central quill, and re-cinch your floss.
Understanding hydrodynamic stability is critical when adjusting terminal tackle for deep drops, just as it is when learning how do you fish for swordfish across strong offshore currents.
Before clipping on your lead system—referenced in our daytime swordfish lead sizing: 8lb to 18lb (chart)—run a tactile moisture check on the squid body. Water trapped inside the mantle tears the meat apart at speed.
Use this three-point failure checklist:
- Siphon Flap Cavitation: Look at the water exhaust siphon on the underside of the head. It must be stitched flat against the body with waxed floss. If the siphon cups open, it scoops water and balloons the mantle cavity.
- Mantle Squelch: Compress the mantle body between your thumb and forefinger from the hook bend to the tip. Any audible squelch or liquid shifting indicates internal water ingress. Water inside the cavity increases hydrodynamic drag by over 15% and strips the mantle off the hook shank during descent.
- Hole Elongation: Inspect the needle entry points along the mantle seam. If needle punctures stretch from round pinholes into oval tears under light hand pressure, the flesh has softened. Discard the bait or reinforce the seam with cross-stitched copper wire.
Try This Today: Fill a 5-gallon bucket with saltwater, submerge your stitched squid, and compress the mantle firmly from tail to head for 5 seconds. If air bubbles or water squirt through your stitch points, strip the head wrap and reseal the collar before rigging your next bait.
Once your bait swims straight without rolling or taking on water, you can move directly to the floss piercing sequence and needle paths detailed below.
The Step-by-Step Squid Rigging Diagram and Stitching Template
Rigging a daytime swordfish squid requires anchoring the mantle to the hook shank with waxed floss and copper wire to prevent the bait from bunching up at 4 knots. If the mantle slips down the hook during a 1,800-foot descent, hydrodynamics warp the squid into a spinning propeller that twists your leader and repels strikes.
A waxed floss stitch is a structural tie through bait tissue made with flat waxed thread, securing the squid flesh directly to the hook or rigging wire. Swordfish pioneer RJ Boyle documented in Florida Sportsman that high-speed drops with Daytime Swordfish Lead Sizing: 8lb to 18lb (Chart) put over 15 pounds of sustained water pressure directly onto the squid’s mantle tip.
       SWORD SQUID RIGGING

          [ Mantle Tip ]
                |
          ( Stitch 1 )  <-- Wire cinch
                |
          ( Stitch 2 )  <-- Penetrates quill
                |
          ( Stitch 3 )  <-- Mid-mantle anchor
                |
        [ Hook Eye / Crimp ]
                |
          ( Stitch 4 )  <-- Throat cinch
                |
          ( Stitch 5 )  <-- Hook bend exit
                |
          [ Hook Point ]
                |
          ( Stitch 6 )  <-- Funnel & head
                |
           [ Tentacles ]
Mantle Size to Wire-Length Benchtop Guide
Use soft annealed copper wire between 18 and 20 gauge to balance strength with pliability. Thin 22-gauge copper wire cuts through soft flesh under hydrodynamic drag, while thick 16-gauge wire tears the mantle when bent. The formula for copper wire is 2.5 times the mantle length plus 4 inches for tag-end wraps.
| Mantle Length | Wire Gauge | Cut Length (Wire) | Floss Segment Length |
|---|---|---|---|
| 8 to 10 inches | 20 gauge | 24 to 29 inches | 18 inches (x6) |
| 11 to 13 inches | 19 gauge | 31.5 to 36.5 inches | 20 inches (x6) |
| 14 to 16 inches | 18 gauge | 39 to 44 inches | 24 inches (x6) |
| 17+ inches | 18 gauge | 46.5+ inches | 28 inches (x6) |
Cut your floss segments in batches before handling thawed bait. According to the International Game Fish Association international angling rules, your hook must remain free-swinging or permanently fixed within the natural contour of the bait without toxic bonding agents. If you fish heavy drag settings, review your cockpit setup alongside Rigging Stand-Up Harnesses for 50+ lbs Drag (Checklist) to handle the resulting hooksets.
Printable Step-by-Step Rigging Checklist
Follow this six-stitch sequence precisely to distribute drag forces along the internal quill rather than the fragile outer skin.
- Gate 1: Prep and Core. Split the squid funnel cleanly down the center. Run a bait needle from the mantle tip down through the interior cavity, reaming a straight path along the gladius (the clear internal quill).
- Stitch 1 (Tip Anchor): Insert the open end of your cut copper wire through the mantle tip, leaving an 8-inch forward tag. Drive your floss needle through the tip 0.5 inches below the apex, wrap three times around the internal backbone wire, and lock it with a square knot.
- Stitch 2 (Quill Pin): Move 2 inches down the mantle. Pass floss horizontally through the outer wall, directly piercing the hard internal quill. Tie off securely around the running copper line to stop lateral sliding.
- Stitch 3 (Mid-Mantle Foundation): Measure the exact distance to your hook eye. Drive Stitch 3 right above the terminal crimp. Wrap the floss through the eye of the hook twice, snugging the mantle directly to the top of the hook shank.
- Gate 2: Tension Check. Pull the copper wire forward while holding the hook bend. The mantle must not stretch or expose more than 0.25 inches of leader between the crimp and the squid flesh.
- Stitch 4 (Throat Lock): Push the hook shank into the mantle cavity, allowing the point to swing freely. Cross your floss over the hook shank inside the mantle cavity, exit through both mantle flaps, and cinch down with a surgeon’s knot.
- Stitch 5 (Hook Exit Seal): Bring the floss needle through the mantle exactly where the hook bend exits the belly. Make two cross-stitches across the seam to prevent water from scooping into the mantle at speed.
- Stitch 6 (Head and Funnel Anchor): Seat the squid head firmly into the mantle collar. Pass your final floss length through the base of the tentacles, through the eye sockets, and wrap twice around the hook shank.
- Final Wire Wraps: Take the forward copper tag from Stitch 1, wrap it five times tightly down the leader to form a clean nose cone, and trim the excess flush with side cutters.
Properly finishing the head mirrors the clean wrap techniques shown in our Gar Wire Rigging: Haywire vs Crimp (Bench Guide) to prevent loose ends from fouling. Mastering this stitch order gives you a baseline bait capable of tracking true past 1,500 feet, which forms the operational core of How Do You Fish For Swordfish.
📋 Pocket Cheat Sheet: Sword Squid Stitch Sequence
Field reference for stitching a daytime swordfish bait.
WIRE: 2.5x Mantle Length + 4" (18-20 ga annealed)
FLOSS: 35 lb flat waxed, 6 pre-cut 20" strands

ORDER OF OPERATIONS:
1. Ream internal quill line with rigging needle.
2. Stitch 1: Nose tip anchor; pin copper tag.
3. Stitch 2: Quill pierce, 2" below Stitch 1.
4. Stitch 3: Hook eye wrap (locks pull point).
* GATE 1: Pull test. Zero slippage on shank.
5. Stitch 4: Throat cinch around upper shank.
6. Stitch 5: Belly exit seal (prevents scooping).
7. Stitch 6: Head & tentacle anchor to hook bend.
8. Wire finish: 5 tight nose wraps down leader.
* GATE 2: Spin test. Bait must pull straight.
Copy this into your notes app.
Rig two fresh squids on your cutting board right now using this checklist, drop them in a bait cooler, and verify their straight alignment in the wash on your next trip.
Sources & Further Reading
Modern daytime swordfish rigging protocols derive directly from commercial longline adaptations and South Florida sportfishing pioneers who engineered hydrodynamic bait stability for depths below 1,500 feet. The mechanics of securing soft bait tissue against extreme vertical currents require structural load distribution rather than reliance on single hook points.
Bridling is an offshore rigging method where an angler attaches a hook externally to the bait using floss or wire rather than embedding the hook shank inside the bait flesh, which allows the natural bait to swim cleanly without spinning under water pressure.
South Florida outfitter RJ Boyle documented the foundational switch from traditional nighttime drifting to weighted daytime presentations in the early 2000s, proving that natural baits towed at speeds between 2.5 and 4.0 knots require copper-sewn mantles to withstand prolonged hydrodynamic pressure. Without copper wire cross-stitching securing the quill and mantle, a squid bait disintegrates within 20 minutes when exposed to continuous vertical and lateral drag at depths exceeding 1,200 feet. Telemetry research conducted through The Billfish Foundation demonstrates that broadbill swordfish (Xiphias gladius) make rapid predatory strikes across temperature layers as cold as 46 degrees Fahrenheit, meaning a stitched bait must survive multiple feeding passes and bill whacks without washing out.
- Boyle, RJ. Daytime Swordfishing (Instructional Series, 2008), establishing the baseline template for South Florida cross-stitching and lead-to-leader configurations.
- The Billfish Foundation, Satellite Tagging and Deep-Drop Swordfish Behavior Reports (2021), detailing daytime vertical migration, strike pressure, and target temperature layers.
- NOAA Fisheries, Atlantic Highly Migratory Species Management Division SAFE Report (2023), providing fishery gear characterization, hook retention guidelines, and deep-water longline research data.
- Poveromo, George. Saltwater Sportsman editorial archives (2012–2020), documenting deep-drop rigging variations, floss bridling techniques, and line-twist reduction strategies.
- Wright, Peter B. Marlin Magazine gear columns (1998–2005), establishing foundational big-game hook placement principles and bait hydrodynamics used in modern swordfish rigging.