Cliff Drone Fishing Safety Checklist (Abort Protocol)
As an Amazon Associate I earn from qualifying purchases. Product links on this page are affiliate links — they cost you nothing extra.
⏱ 20 min read
Core Safety Rules for Drone Fishing from Sea Cliffs
Cliff-based drone fishing requires setting fail-safe Return-to-Home altitude at least 15 meters above the highest point of the launch ledge, maintaining a 3-meter physical setback from cliff edges, and deploying dedicated mechanical release clips. Without these operational controls, rotor-wash turbulence and line friction will drag the aircraft into the surf. Surviving a deployment failure depends entirely on executing an immediate release sequence the instant stability degrades.
Return-to-Home is an automated navigation fail-safe that commands an unmanned aerial vehicle to climb to a preprogrammed altitude and fly autonomously back to its takeoff coordinates during signal loss or low battery warnings.
Standard beach-casting habits fail on elevated rock platforms. On a flat shoreline, an angler typically takes off at sea level and sets Return-to-Home to 30 meters, which easily clears sand dunes and coastal brush. According to unmanned aircraft operating principles documented by the Federal Aviation Administration, onboard barometric altimeters calculate relative elevation from the specific barometric pressure at the takeoff surface, not the water below.
If you launch from a 25-meter cliff with a standard 30-meter beach profile, your safety buffer above the rock ledge shrinks to just 5 meters. Strong ocean updrafts hitting the cliff face compress air along the ledge crest, skewing barometric sensors by up to 4 meters of false altitude. If the failsafe activates, the quadcopter can fly directly into the rock edge on its return path. Always measure the ledge height and add 15 meters to that figure to determine your minimum Return-to-Home altitude ceiling before arming the motors.
Pro-Tip: Calibrate the compass and lock at least 14 GPS satellites on flat ground 10 meters behind the rock rim before moving to your casting station. Iron deposits in ocean rock faces and salt-encrusted rebar distort onboard magnetometers during takeoff.
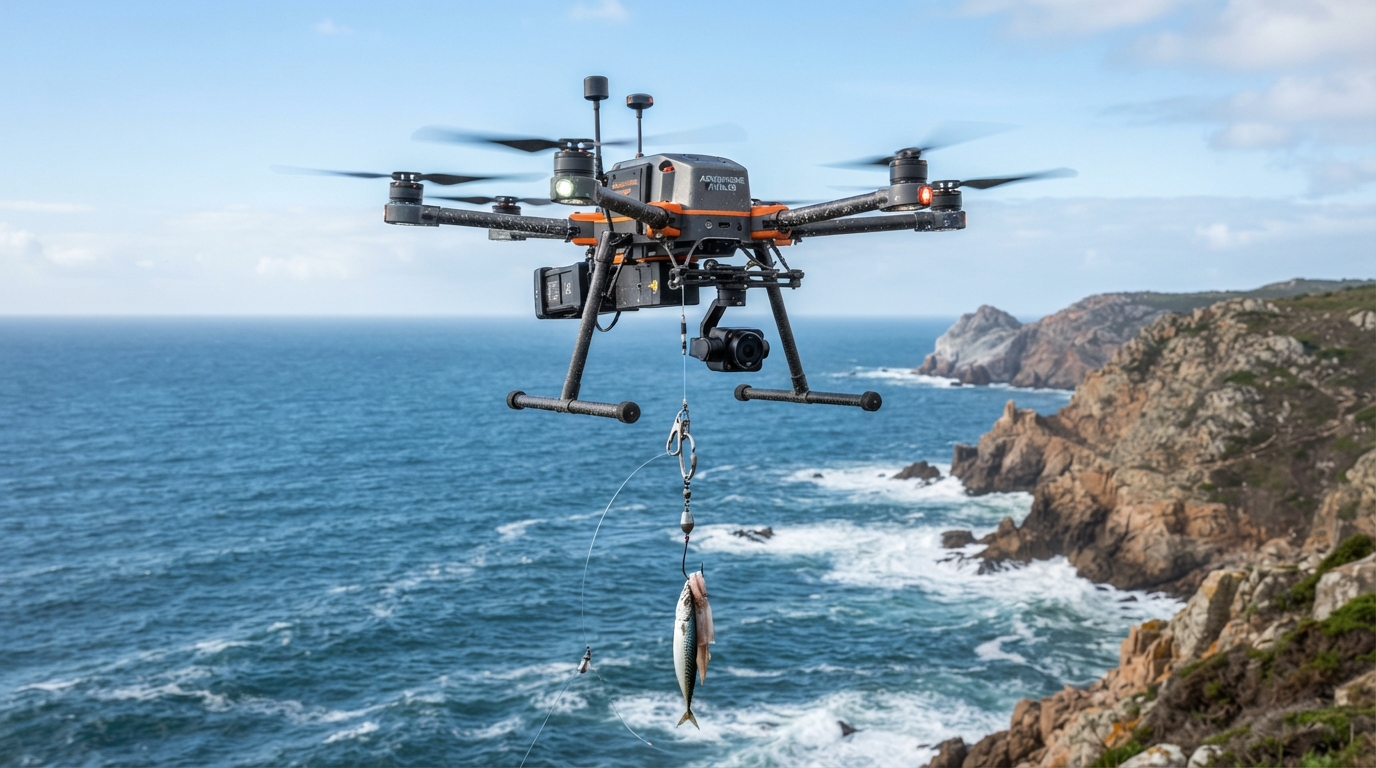
Carrying ocean baits over vertical drop-offs exposes a multirotor to violent physical forces that do not occur on flat beaches. Once a 600-gram bait and 200-gram lead sinker swing over the ledge, the drone loses the ground effect cushion instantly. Ground effect is an aerodynamic condition where downwash from the spinning propeller blades compresses against a solid surface, generating extra lift with lower battery consumption.
As the air drops out beneath the hull, the sudden loss of cushion creates an immediate downward pull. Wind tunnel studies by the American Institute of Aeronautics and Astronautics show that coastal updrafts striking vertical cliffs generate shear currents exceeding 25 knots within 2 meters of the rim. This turbulence turns the hanging bait into an uncontrolled pendulum. As detailed in our Drone Bait Drop Payload Guide (With Calculator), an 800-gram static payload exerts dynamic shock loads exceeding 2.4 kilograms on the airframe when buffeted by vertical crosswinds.
These pendulum forces will destabilize flight controllers on commercial quadcopters such as the SwellPro SplashDrone 4 or DJI platforms. If you do not monitor consumption rates over open water, dynamic resistance cuts flight duration by more than 40 percent, as shown in our Drone Bait Payload vs Battery Drain (With 500m Chart).
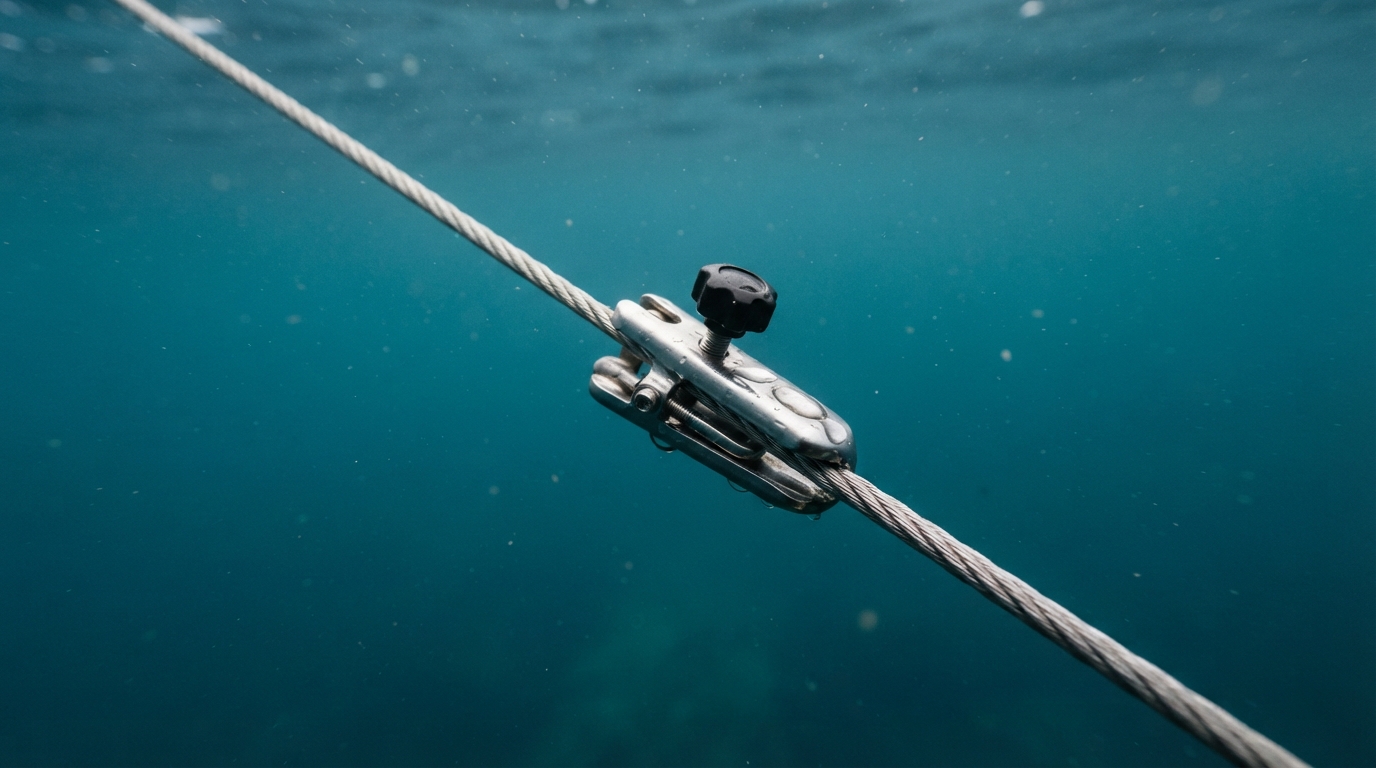
Anglers who fish heavy gear using Land Based Shark Fishing Rods face another hazard: line drag. When casting hundreds of meters off an elevated ledge, spool friction and ocean spray on 80-pound braid pull backward on the drone carriage. Rubber-band release clips and cheap tension snaps stretch under this load instead of releasing cleanly, locking the aircraft to a stationary line spool.
Pro-Tip: Never run tension-only friction clips on elevated rock ledges. Use a dedicated servo-actuated mechanical release that drops the tow loop instantly when you toggle an assigned switch on the radio controller.
Mechanical releases ensure you can disconnect the payload the second line-spooling tension spikes. The step-by-step pre-flight abort sequence below details the exact second-by-second inputs required to save the airframe when an ocean gust knocks the aircraft off course.
Key Takeaways
- Set Return-to-Home elevation at least 15 meters higher than the cliff launch point.
- Abort deployment instantly if satellite lock drops below 10 or wind shear exceeds 20 knots.
- Position the launch pad at least 3 meters back from the cliff edge to avoid shear updrafts.
- Disengage line tension immediately via manual bail trip if drone trajectory drops mid-flight.
Table of Contents
- Core Safety Rules for Drone Fishing from Sea Cliffs
- Managing Ocean Updrafts and Ledge Wind Compression Zones
- Tension Release Systems and Spool Jam Prevention Tactics
- Critical Controller and Sensor Calibration for Rocky Terrain
- The 4-Second Abort Protocol for In-Flight Emergencies
- The Printable Cliff-Edge Drone Safety Checklist
- Sources & Further Reading
Managing Ocean Updrafts and Ledge Wind Compression Zones
Horizontal ocean winds compress and accelerate vertically when they strike a sheer rock face, generating an updraft that can flip an overloaded drone in less than two seconds.
Edge vortex turbulence is a rotating air mass that forms along the crest of a cliff where horizontal marine air collides with the vertical rock face, rolling upward and inward over the flat top. According to aviation meteorology principles outlined in the Federal Aviation Administration Pilot’s Handbook of Aeronautical Knowledge, moving air mass forced upward by terrain causes mechanical turbulence that directly scales with cliff height and wind velocity. When an incoming 18-knot onshore breeze hits an 80-foot vertical drop, the compressed air directly over the ledge accelerates up to 30 knots in an upward vector. Launching a heavily weighted drone into this compressed zone causes immediate aircraft instability, because the flight controller suddenly receives unpredictable lift under one side of the airframe.
This localized pressure differential creates two immediate mechanical hazards: altitude ballooning and rotor stall. Altitude ballooning occurs when an aircraft encounters a violent vertical thermal draft or ridge updraft, forcing the barometer to read a rapid pressure drop that causes the drone to surge skyward against motor commands. Conversely, rotor stall risks spike when descending back through this boundary layer with a heavy bait payload. If you calculate your drop parameters via the Drone Bait Drop Payload Guide (With Calculator), you know that heavy lead and bait rigs already push motor duty cycles past 70%. When an automated descent command cuts motor RPM just as the aircraft re-enters the high-velocity vertical updraft, the rotor blades lose effective angle of attack, inducing an aerodynamic stall and dropping the drone directly onto the rocks.
       WIND PROFILE

     Air Flow: 18 kts
  ═════════════════>
                     ▲ 30 kts Updraft
             _ _ _   │
           /       \ │
          │  VORTEX ││
  ────────┴─────────┘│
  SETBACK    EDGE    │
  (3m+)              │
                     │ CLIFF
                     │ FACE
                     │
  ~~~~~~~~~~~~~~~~~~~│
        OCEAN        │
Eliminate this failure point by strictly enforcing the 3-meter setback rule. This protocol dictates that you position your takeoff pad at least 3 meters (10 feet) behind the absolute edge of the rock ledge. Placing your craft behind this boundary buffers the airframe from the curling lip vortex, which typically peaks within 1.5 meters of the drop-off. You maintain full line-of-sight command, clear the compression bubble under stable horizontal power, and preserve battery reserves that would otherwise burn fighting edge turbulence—a critical consideration detailed in our analysis of Drone Bait Payload vs Battery Drain (With 500m Chart). Anglers staging heavy Land Based Shark Fishing Rods must never sacrifice this buffer zone simply to stand closer to their rod holders.
📋 Pocket Cheat Sheet: Ledge Wind Management
Setback, launch, and recovery metrics for cliff drone drops.
EDGE SETBACK RULE:
- Absolute minimum buffer: 3.0 meters behind ledge
- Vortex danger zone: 0 to 1.5 meters from lip

WIND THRESHOLDS:
- Max sustained onshore wind: 18 knots
- Max cliff-face compression speed: 30 knots
- Abort launch if ledge gusts exceed 22 knots

TAKEOFF PROCEDURE:
1. Ground check: confirm zero ground-effect vortex
2. Vertical punch: climb to 5 meters above ledge height
3. Horizontal transition: full throttle punch seaward
4. Never pause aircraft within 2 meters of the lip

RECOVERY VECTOR:
- Approach altitude: +10 meters above cliff platform
- Cut payload early: release drops 50m offshore
- Descent rate: max 1.5 m/s through shear layer
Copy this into your notes app.
Once you clear the compression zone and send the bait seaward, you face an entirely different set of physical forces when the reel spool begins dumping hundreds of yards of line into the offshore current.
Tension Release Systems and Spool Jam Prevention Tactics
Drone bait release failures on rocky ledges stem from an unmanaged line spool rather than sudden motor burnout. When line wraps around a spool lip or snags an offshore guide, the drone encounters an immediate anchor effect that can exceed maximum motor thrust in under 200 milliseconds. Selecting between mechanical tension releases and electronic pin drops dictates your margin of error when line stops running freely.
A mechanical release is a spring-loaded line-clamping device calibrated to pop open when line tension exceeds a preset physical resistance threshold. Electronic releases, by contrast, rely on a remote-actuated servo arm that opens only when the pilot flips an auxiliary radio switch.
Electronic releases introduce catastrophic risk during high-speed spool overruns. According to the manufacturer operating manual for the SwellPro SplashDrone 4, the aircraft generates 2.8 kilograms of peak thrust per motor. If a conventional big-game spool birds-nests during transit, an electronic release holds firm, pulling the drone downward into an irrecoverable stall before the pilot can toggle the switch. Mechanical systems—such as the Sky-Claw or tension release clips engineered by Gannet—release passively the instant drag exceeds the clip calibration. The mechanical clip sheds the line instantly, saving the airframe at the cost of a dropped bait.
Configuring mechanical release tension requires strict calibration against wind shear and bait weight. Bait drag increases exponentially with flight speed; an 800-gram bonito bait can generate more than 1.5 kilograms of dynamic drag at an airspeed of 10 meters per second. If you set your release tension below total dynamic drag, the bait drops prematurely into the surf zone. If you calibrate it too high, you compromise the safety margin that prevents line-jam rollovers.
You must calculate line release limits alongside battery consumption metrics, as detailed in our analysis of Drone Bait Payload vs Battery Drain (With 500m Chart). The standard operating tolerance requires setting the mechanical release threshold to precisely 150% of the deadweight bait package, provided that number does not exceed 40% of the drone’s net reserve lift capacity. Use a hand-held push-pull gauge to measure clip pull-off resistance before every flight session.
Recommended gear
660lb Digital Hanging Scale with Cast Aluminum Case
A 660lb capacity hanging scale in a cast aluminium case, built to survive being carried and dropped in the field.
Affiliate link
Controlling the line at the rock face demands a strict two-person crew protocol. Attempting to pilot a drone while thumbing an open spool invites line overrun and rock-face tackle damage. When deploying heavy baits on specialized Land Based Shark Fishing Rods, line management requires 100% of an operator’s physical attention.
The division of labor is absolute: the designated remote pilot commands the aircraft and tracks telemetry, while the reel tender governs spool velocity and line path clearance. The reel tender maintains the reel in free spool with the clicker engaged, standing 2 meters behind the rod tip to monitor for guide wraps. If line peeling slows while drone distance expands, the tender calls an immediate abort via standard verbal commands. The pilot never takes eyes off the drone attitude indicator, and the reel tender never looks away from the line feeding off the spool drum.
Copy-Paste Template: Two-Person Drone Deployment Command Script
PRE-FLIGHT SPOOL VERIFICATION
Reel Tender: "Reel seated in harness. Free-spool lever tested. Guide clear from butt to tip."
Pilot: "Tension release calibrated to [TARGET LBS/KG]. Tether connected."
Reel Tender: "Clicker ON. Spool under manual thumb pressure. Ready for lift."

TAKEOFF SEQUENCE
Pilot: "Lifting to hover at [TARGET ALTITUDE, e.g., 10 METERS]."
Reel Tender: "Line feeding freely. Tension nominal."
Pilot: "Transitioning forward. Outbound run commencing."

OUTBOUND FLIGHT CALLOUTS
Reel Tender: "Feed rate nominal. 100 meters out."
Reel Tender: "Feed rate nominal. 200 meters out."
Pilot: "Approaching drop mark at [TARGET DISTANCE, e.g., 350 METERS]. Slowing ground speed."
Reel Tender: "Thumb pressure matched to descent. Spool clean."

DROP AND RECOVERY
Pilot: "Releasing payload in 3... 2... 1... Release confirmed."
Reel Tender: "Payload drop verified on line. Engaging clicker and reel drag."
Pilot: "Airframe clear. Executing Return-to-Launch."

EMERGENCY ABORT PROTOCOL
Reel Tender: "STOP SPOOL! JAM DETECTED! ABORT FLIGHT!"
Pilot: "Pitching back to hold position. Manual payload release activated."
Reel Tender: "Line severed/cleared. Airframe safe."
Executing these exact callouts keeps rock-platform crews coordinated when wind noise makes casual conversation impossible. Review the step-by-step checklist below to verify your mechanical release tolerances before powering on the flight controller.
Critical Controller and Sensor Calibration for Rocky Terrain
Calibrating a drone magnetometer directly on basalt ledges or mineralised rock platforms corrupts sensor heading data and causes uncontrollable horizontal drift immediately after liftoff.
A magnetometer is an internal navigation sensor that measures the direction and strength of the earth’s geomagnetic field to determine the drone’s physical heading.
According to data published by the United States Geological Survey Geomagnetism Program, volcanic basalt formations produce localised magnetic anomalies exceeding 5,000 nanoteslas. That level of distortion blinds the sensor. If you calibrate your compass against high-iron rock, the aircraft stores a warped magnetic baseline. The moment the drone climbs 3 metres into clean air, the flight controller detects a conflict between GPS track data and compass heading. It drops out of satellite positioning mode and enters manual attitude mode.
To prevent this error, complete compass calibration at least 50 metres inland on clean turf or sand before moving to the cliff edge. If you must calibrate on a rocky ledge, place the aircraft on an elevated, non-metallic platform at least 1.2 metres above the rock face.
Barometric altimeter drift presents a second structural hazard along coastal headlands. A barometric altimeter calculates flight height strictly by tracking shifts in atmospheric pressure relative to its takeoff point. When you launch from a cliff 30 metres above sea level, the flight computer establishes that ledge as 0 metres elevation. As you fly seaward toward the strike zone, the drone drops toward the water, registering negative values on your telemetry screen (such as -25 metres).
Coastal updrafts striking vertical cliffs compress local air masses, producing artificial high-pressure pockets along the cliff crest. The World Meteorological Organization notes that localized cliff-face pressure variations can distort barometric altitude readings by up to 8 metres within a 10-metre horizontal band. Power the drone on at the cliff edge and let the barometer stabilize for 120 seconds before arming the motors. Never cycle aircraft power down at water level if landing on an intertidal shelf, as this resets zero altitude to low tide and turns the cliff face into an unmapped obstacle during automated flight phases.
Lock your GPS home point coordinates and fail-safe parameters before attaching release clips or bait rigs. Setting these thresholds early prevents premature gear loss when managing heavy setups on Land Based Shark Fishing Rods. Review your calculated line weight and drag using the Drone Bait Drop Payload Guide (With Calculator) prior to spooling out.
Set your Return-to-Home (RTH) altitude ceiling to a minimum of 20 metres above the highest physical terrain point behind you, including light towers and rod tips. If signal loss occurs while flying a bait out, the aircraft stops, ascends vertically to that pre-programmed fail-safe ceiling, and tracks straight back toward the home coordinate. If your RTH ceiling is set lower than the cliff rim, the drone will fly directly into the rock face.
The Cliffside Launch Readiness matrix
Green Launch
Clean magnetic field and stable barometric baseline.
Belongs here if: Magnetometer interference is below 150 units and satellite count is 14 or higher.
Then: Clip the terminal tackle, confirm the fail-safe altitude, and initiate takeoff.
Sensor Lockout
Severe magnetic interference from underlying ironstone bedrock.
Belongs here if: The controller displays compass redundancy errors or yaw deviation alerts on the ground.
Then: Move the aircraft to an elevated non-metallic stand or relocate 15 metres inland.
Pressure Trap
Unstable air pressure caused by severe cliff-face updrafts.
Belongs here if: Telemetry altitude fluctuates by more than 2 metres while the drone sits stationary.
Then: Wait 180 seconds for barometer stabilization; abort if readings continue drifting.
Hard Abort
Unresolved sensor mismatch combined with low satellite acquisition.
Belongs here if: The system detects both a compass error and fewer than 12 locked satellites.
Then: Cut motor power immediately, unrig all tackle, and inspect hardware before re-testing.
Confirming your sensor baselines protects the aircraft during the transit phase, but turbulent onshore air currents near the drop target introduce independent mechanical loads that require a dedicated abort threshold.
The 4-Second Abort Protocol for In-Flight Emergencies
The 4-second abort protocol requires an immediate mechanical payload release the moment tackle drag, battery stress, or navigation drift threatens aircraft stability. When deploying heavy baits from sea cliffs, an unresolved mid-air emergency pulls a multi-rotor into the ocean or smashes it against the rock face in under five seconds. Operators must execute decisions based on hard telemetry thresholds rather than visual optimism.
The Three Mandatory Abort Triggers
An abort is mandatory the instant your flight parameters hit any of these three operational limits:
- Spool Bind: A line overrun or bird’s nest locks the spool on your land-based gear. When line stops feeding freely from your Land Based Shark Fishing Rods, horizontal tether tension exceeds rotor thrust in less than 0.8 seconds. This arrests forward progress and violently pulls the drone down toward the surf.
- Sudden Voltage Sag Under Load: According to flight operating guidelines published by SwellPro, a standard 6S lithium-polymer battery operating under a 2.0 kg payload must not drop below 21.6 volts (3.6 volts per cell) during sustained forward flight. If voltage drops below 21.0 volts during initial climb-out, the power pack lacks the reserve current to fight offshore head-winds. For precise payload and battery benchmarks, cross-reference our Drone Bait Payload vs Battery Drain (With 500m Chart).
- Loss of Satellite Lock: Operating below sheer basalt or granite faces causes signal deflection.
GPS multipath error occurs when satellite radio signals reflect off vertical rock faces before reaching the onboard receiver antenna, corrupting the drone’s calculated spatial position and causing uncommanded lateral drifts.
If the Global Navigation Satellite System (GNSS) receiver drops below 12 satellites, or if your ground station displays a compass variance warning, abort immediately.
Emergency Jettison Sequence
Do not attempt to fly home with a compromised rig. Dropping bait into the water costs a fraction of an airframe replacement and instantly restores 100% of your power margin, as documented in our Drone Bait Drop Payload Guide (With Calculator).
Execute this sequence without deviation:
[SECOND 0: TRIGGER OCCURS]
       |
       v
[SECOND 1: RELEASE SWITCH]
Engage manual payload release.
Confirm line falls free.
       |
       v
[SECOND 2: FULL THROTTLE CLIMB]
Punch throttle to 100%.
Gain 15m vertical clearance.
       |
       v
[SECOND 3: ORIENTATION CHECK]
Confirm aircraft attitude.
Identify wind drift vector.
       |
       v
[SECOND 4: MANUAL NAVIGATION]
Switch out of autonomous RTH.
Steer clear of cliff wash.
If the mechanical release fails to trip at Second 1 due to line tension, open the reel bail arm fully on the cliff deck. If the reel is already locked, cut the mainline instantly with your safety shears.
Manual Override Protocols Near Rock Walls
Automated Return-to-Home (RTH) modes are dangerous near elevated headlands. The Federal Aviation Administration warns that automated return algorithms calculate a flat, direct vector between current coordinates and the home point. On sea cliffs, that straight line frequently routes the drone directly through a 20-meter cliff projection or into turbulent thermal updrafts blowing off the rock face.
When an abort occurs, switch the flight mode switch immediately from GPS or Position Hold to Manual or Attitude (ATTI) mode. Attitude mode disables automated satellite navigation, maintaining aircraft level while ignoring position drift. This stops the flight controller from making violent autonomous corrections toward the cliff when satellite signals fluctuate.
Push pitch forward to steer the aircraft out over open water, establish a safe operating altitude at least 15 meters above the cliff edge, and fly the drone back under direct stick input. Keep your approach path perpendicular to the cliff edge to avoid the rolling wind turbulence that forms directly on the leeward lip of rock platforms.
Try This Today: Muscle memory dictates survival speed during a flight abort. Pick up your remote controller right now with the power off, close your eyes, and flick the physical emergency payload release switch five times in under three seconds without looking down at the switches.
Once you master this mechanical release sequence, the next critical task is locking down your physical cliff-edge landing pad before turbulence claims your gear.
The Printable Cliff-Edge Drone Safety Checklist
Safe drone bait deployment from coastal rock ledges requires a strict four-phase operational checklist to eliminate airframe loss and angler injury. Operating near jagged cliffs leaves no room for pilot hesitation or mechanical failure.
Phase 1: Pre-Launch Ledge Assessment
Begin with a physical perimeter check before unpacking your flight case. Confirm that your takeoff platform sits at least 3 meters above the highest wave splash zone to avoid salt spray intrusion into the motor housings.
Magnetic interference is the disruption of an aircraft’s internal compass sensors caused by metallic mineral deposits, rebar, or electrical currents in surrounding rock formations, which degrades position holding and navigation accuracy.
Place your compass on the rock surface to check for local needle deflection before powering up the flight controller. According to safety protocols published by the Federal Aviation Administration (FAA), unmanned aircraft must avoid erratic control surfaces caused by sensor degradation. Check prevailing winds against coastal forecasts from the National Oceanic and Atmospheric Administration (NOAA). Ground-level gusts must remain below 70% of the airframe’s rated maximum wind resistance, typically 12 meters per second for heavy-lift platforms. Verify your line angle to ensure wind vectors blow away from cliff faces, preventing downdrafts that force aircraft down into the surf.
Phase 2: Rigging and Terminal Payload Verification
Inspect the release release-loop mechanism before attaching the bait payload. Use 0.40 mm monofilament for your mechanical breakaway loop, sized to snap at 4.5 kg of sudden line load if a reel binds. Check payload weights against the parameters detailed in our Drone Bait Drop Payload Guide (With Calculator) to avoid exceeding 60% of your platform’s maximum lifting capacity.
Verify payload release tension with a hand scale before flight.
Spool tension on Land Based Shark Fishing Rods requires precise calibration prior to motor start. Set reel drag to no more than 0.5 kg of resistance, or put conventional reels into free spool with the clicker engaged. Excessive line drag pulls the tail of the drone down, causing rapid motor overheat. Ensure your mainline sits clear of sharp basalt outcroppings that can sever 80 lb braid under launch tension.
Phase 3: The 60-Second Hover Test
Lift off to an altitude of 5 meters directly above the launch pad and initiate a 60-second operational hover. Confirm the drone holds its position within a 0.5-meter radius without drift. The DJI Flight Operations Manual dictates that pilots maintain a minimum lock on 12 GPS satellites before advancing past line-of-sight boundaries.
Test pitch, roll, and yaw authority with short, precise stick inputs over safe rock terrain. Trigger the release mechanism test pin while hovering to verify positive servo activation before the aircraft heads seaward. Monitor real-time telemetry to check the impact of payload mass, referencing our data on Drone Bait Payload vs Battery Drain (With 500m Chart) to ensure voltage draw matches your calculated flight envelope. Abort the drop immediately if battery cell variance exceeds 0.10 volts during this initial hover.
Phase 4: Post-Drop Recovery Protocol
Release the bait immediately upon reaching target coordinates, then start the return journey without hovering over open water. Depleted batteries lose voltage faster under aggressive headwind recovery runs. Maintain a minimum flight altitude of 15 meters to clear thermal updrafts and cliff-edge turbulence.
Disable automated Return-to-Home (RTH) modes when approaching vertical cliffs. Built-in RTH algorithms fail to detect undercut ledges and can drive the drone into vertical rock faces. Use manual control for the final descent. Land the craft cleanly on a secured, high-visibility 1.5-meter landing pad pinned down with lead weights. Cut motor power the instant all landing struts settle on the deck.
5-Day Cliff Deployment Skill Plan
Gate: Stop here if manual landings repeatedly touch down outside the 1.5-meter boundary.
Laminate this checklist and store it inside your primary battery case to complete every verification step before your next drop.
Sources & Further Reading
Cliff-based drone deployment demands strict compliance with aviation safety frameworks, aerodynamic principles, and verified emergency protocols. When you cast baits into heavy surf from 40-foot headlands, your operating margins are dictated by maritime physics and federal aviation law rather than trial and error.
A mechanical downdraft is a severe, downward-moving column of air that occurs when ambient horizontal wind hits a vertical obstruction like a cliff face and curls sharply toward the surface of the water. According to flight-testing guidelines published by the Federal Aviation Administration, a multirotor aircraft operating within 100 feet of steep geological formations requires an immediate throttle surplus of at least 25% to counteract sudden localized downwash. Without that power overhead, automated altitude stabilization often fails before the pilot can register the sink rate.
The Civil Aviation Safety Authority of Australia mandates in CASA Advisory Circular AC 101-01 that operators maintain a minimum horizontal distance of 30 meters (approximately 98 feet) from non-participating people, a standard that directly governs crowded rock platforms. If your payload release jams while hovering 200 meters offshore, attempting to drag an 8-ounce sinker backward through a 20-knot wind directly violates this clear buffer zone. Rock anglers who ignore established mechanical limits routinely destroy airframes and endanger bystanders.
Field data from the National Oceanic and Atmospheric Administration indicates that rogue wave run-up along exposed rocky headlands frequently exceeds base swell height by a ratio of 2:1. When setting your automated Return-to-Home failsafe, a launch-point elevation set from the waterline instead of the cliff lip will drive an returning aircraft straight into the granite face. Every abort pathway must account for these vertical terrain barriers before the rotors spin up.
- Federal Aviation Administration, Small Unmanned Aircraft Systems (Part 107), 2016. Establishes legal ceiling limits, visual line-of-sight mandates, and pilot responsibilities during flight emergencies over coastal waters.
- Civil Aviation Safety Authority (Australia), AC 101-01: Remotely Piloted Aircraft Systems, 2021. Provides the baseline standard for safe standoff distances and failsafe automation requirements near public rock shelves.
- National Oceanic and Atmospheric Administration, Coastal Currents and Wave Dynamics Guidelines, 2019. Details the 2:1 wave run-up ratios and littoral surface boundary winds that directly affect multirotor cliff launches.
- Dale Crane, Dictionary of Aeronautical Terms, Aviation Supplies & Academics, 2020. Supplies standardized definitions for aerodynamic downdraft forces, mechanical turbulence, and aircraft payload balance limitations.
- US Army Field Manual, FM 3-04.203: Fundamentals of Flight, 2007. Establishes the core aerodynamic principles of ground effect, boundary layer turbulence, and rotor recovery within downdraft zones.